
ASSEMBLY AND USE
WARNING!!!
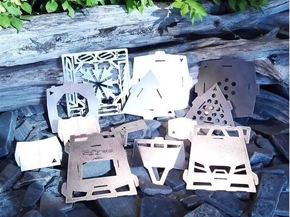
None of the stoves are easy to put together, unless you're either exceptionally coordinated or skilled in the dark arts. To determine if you're exceptionally coordinated or skilled in the dark arts, watch the assembly videos below to see if you would be able to replicate the assembly process.
|
2016 Core 4 Bio-Reactor Ultimate (Gen 2) assembly by: Tae ho Kim
Core 4 Bio-Reactor Assembly (Gen 1)
Everyone would like to see how you assemble and use your stove so if you make an assembly video, please let us know so we can post it here :)
Core Alcohol Stove Assembly InstructionsCore Alcohol Stove Assembly Instructions PDF
Core Thermite Assembly InstructionsCore Thermite Bio-Reactor Assembly Instructions PDF
Core Frag Assembly InstructionsCore Frag Bio-Reactor Assembly Instructions PDF
Core 4 Assembly InstructionsCore 4 Bio-Reactor Assembly Instructions PDF
Core 5 Assembly InstructionsCore 5 Bio-Reactor Assembly Instructions PDF
|
More assembly instructions by you guys!
MSP Core 4 in Wood Gas Mode Assembly "My way" by AngryDaddyBird
Assembly of the MSP Core 4 Bioreactor in 3 Mode , Wood Gas Mode & rocket mode
Msp Core 5 stove (Gen 1) assembly by Adventure Time Outdoors
Stoves In Action We put lots of work into designing and finishing these stoves for your enjoyment and its great to see videos of you guys out there enjoying them. Nothing like using a quality, well designed piece of gear out in the woods and the crackle of a fire at night.
Igniting a Core Ti 4 wood stove using Flint and Steel by MegaWoodsWalker
MSP Core 4 stove field test by MegaWoodsWalker
2016 Core 4 Bio-Reactor Ultimate in action using Wood Pellets by Silver Birch Outdoors
MSP Core FRAG Ultimate Titanium Stove - First Use and Abuse Test by "sameold77"
More videos can be found on the bottom of the page HERE |
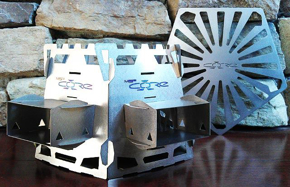
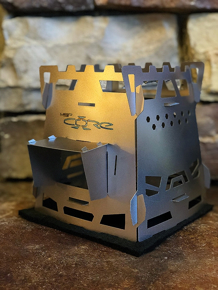
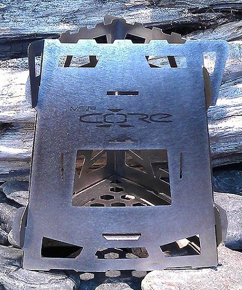
Core 4 Stove (Gen 1) Assembly and Use Instructions
The Core Stove is a wood burning stove that burns its own exhaust. Afterburner plates guide fresh superheated air to the top of the stoves exhaust port and inject it into the exhaust. The Top Lit Updraft (TLUD) plate slows the exhaust, focuses it and together they will burn any smoke that tries to escape once the unit reaches operating temperatures. The stove is built to last a lifetime and if you happen to lose any of the parts, replacements are available online at http://Shop.MySurvivalPack.com We welcome you to share your tips, tricks reviews and advice on our forums at http://MySurvivalPack.com or join us on Facebook at http://www.facebook.com/mysurvivalpack .
1. | 2. | 3. |
1. Hook two sides together holding them in the palm of your hand upside down. Insert afterburner tabs into slots in side panels. 2. Insert afterburner supports into slots in burn plate and insert burn plate tabs into slots in side panels. 3. Insert tabs of TLUD plate into side panel pot support holes making sure that the side with no tab is facing the front panel. | ||
4. | 5.  | 6. |
4. If using the heat shield panel, insert the tabs into the bottom ports of each side panel before adding the front panel. 5. Attach front panel and maneuver the burn panel and heat shield tabs into corresponding slots, slide the hooks together to complete. 6. Rocket port assembly. Bottom panel large sides have no tab. Hook side panels to bottom panel with hooks facing down wards | ||
7.  | 8.  | 9.  |
7. Add rocket port top panel with large tab on same side as hooks. Slide rocket port hooks into slots on either side of the fuel port 8. Slide rocket port all the way down until the large tab on the top plate pops into the mouth of the fuel port 9. Door hinge slot is above the fuel port | ||
 |  |  |  |
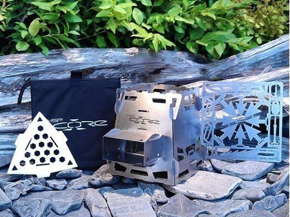
GRILL TIP: The grill was designed to fit on the stove without the TLUD plate. Each beam fits into a notch in the top of the panel. The CORE logo orientation will vary depending on which way the stove is assembled. The grill is thin to be weight efficient and may warp while in use. Allow it to cool naturally and it will return to its original shape. | AFTERBURNER TIP: To increase the draft performance of the Afterburners make sure they are bent enough to create a seal against the side wall of the stove when fully assembled. | FUEL TAB MODULE TIP: The fuel tab module fits into one of the afterburner slots. Bend its small support leg down and slide the ‘T’ into the slot in the side panel. Then center the module. The clip cut into the tab is designed to hold a solid fuel tab container made from an aluminum or tin can. | DAMPER PLATE TIP: Damper plates can be made from tin or sheet metal. Slightly bend the damper plate and insert one side into the pot support opening. Then insert the other side and center the plate. Each end should have a quarter inch inside the stove resting on the pot support. Bottom damper plate tab is just a clip to hold a damper plate over the lower ports. |
GENERAL USE
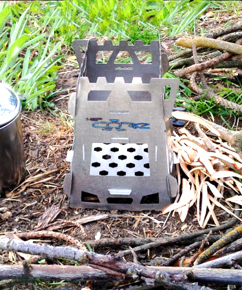
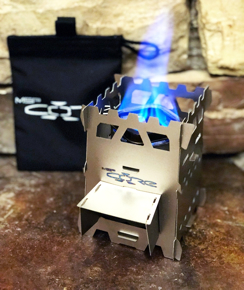
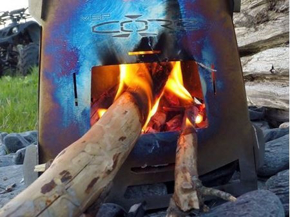
The Core can be used with or without the afterburner and TLUD plates or even using only the side panels over a ground fire. Start a small pilot fire by top loading the stove with bio material and slowly add larger sticks as the fire grows, The stove will begin to heat up and the flame will center itself in the middle of the TLUD plate. At this point the afterburners are superheating the air, burning the exhaust smoke and the stove is ready to cook on. Sometimes setting your pot on the top of the stove will heat the stove up to operating temperature faster. Once the unit reaches operating temperature stuff the fuel port full of fuel and slowly push it in as it’s consumed. The less space in the fuel port, the less fire will creep out. If using the Rocket Port it’s not as critical to keep the fuel port full. Resting the door on the top of sticks in the fuel port helps guide heat into the stove. If the fire should go out and smokes profusely, it’s possible to re-light the smoke with a match or lighter by placing a flame near the TLUD plate opening.
For full TLUD mode, assemble afterburners on the fuel port plate side to cover the fuel port and on two or more additional sides. Pack the stove with as much wood (or wood pellets) as you can through the TLUD plate, preferably standing on end. Light a small pilot fire on the top of the wood and keep it going until the wood inside the stove starts to burn. Place your cooking pot on the stove and the burn chamber will begin to heat up until the afterburners kick in. Using this method burns can sometimes last over 1 hour without stoking or adding more fuel.
Black soot and tar will get on your cooking utensils when using this stove due to soot and condensation of wood resins onto the cooking surface triggered by the heat differential between the intense heat of the fire and the cool of the cooking surface. One method to remove this tar is to coat your cooking utensil with hand soap first or harden the tar by running the cooking utensil under ice cold water and then scrubbing it with a stainless steel scouring pad. Another method is to use the bottom heat shield plate as a griddle, setting your cooking utensil on top of the griddle to shield it from direct flame. That way you only have to clean the flat heat shield rather than your whole pot/pan.
Options to clean your stove include running it under cold water and scrubbing it with a heavy duty scotch pad or just sand it with 60 or 80 grit paper and an orbital sander.
CAUTION (obligatory safety warning):
Be safe when using this stove. Some edges may be sharp. Handle with care! Never start a fire in this stove indoors. The stove gets very hot while in use and takes a couple minutes to cool down after the fire is out. Do not throw water on the stove while its hot to cool it down because it will turn into a twisted piece of art.